Blog

Cooking with Appliances

I was a late bloomer when it comes to cooking. Until I was in my 60s I ate three meals a day in restaurants. I told myself I didn’t have time to cook, and definitely no time to clean up afterward. I think I may have had a phobia about ovens. The thought of opening a hot one terrified me. Something to do with wicked witches in deep-forest cottages.

My friend, the actor Ian McKellen, is a great cook and he got me started. We made scrambled eggs and vegetable soup together and then he gave me a recipe book with a few dozen easy soups. His method for scrambling eggs avoids frying them, by starting with a cold pan and all the ingredients in: eggs, butter, a little cream or milk and seasoning. Turn the heat on medium-low and scramble, stirring constantly until done. I use a whisk for extra-fluffy results. It’s a bit more work but the results are worth it.

I made progress one dish at at time. Even before the pandemic of 2020 I was baking no-knead bread and making my own pasta. My real breakthrough, though, was when I discovered small kitchen appliances. Now I have about 30 of them, and they make cooking easier and quicker. I rarely use the big, scary oven except for cookies and rolls. I tend to buy quality brands such as Cuisinart, Breville, OXO, Zojirushi, Cuckoo and Kitchen Aid. They work better and last longer. You can save money on ingredients, avoiding pre-made, processed foods by mixing your own seasonings, waffle mix etc.

People hate bread machines. Most people have bad experiences, using them once or twice before they go into storage or donation. The cheaper ones do not produce good results, which require two kneaders. People are ambitious and want to try lots of fancy variations, but they might have better luck sticking to basic multi-grain loaves. A bread machine like the Zojirushi BB-PDC20BA gives you the ability to bake cheap, nutritious loaves of bread without the chemicals, preservatives and sugars of the commercial loaves. I save time and effort by pre-mixing the dry ingredients and putting loaf-sized portions into mason jars. When I want to bake, I use a jarful of mix with the wet ingredients and yeast. I also use the “dough” setting to knead sponge dough that I use for hamburger buns, which are then baked in the regular oven.

An air fryer will also save money versus a full-sized oven. After trying a few of the drawer-type, I settled on a countertop convection oven, the Cuisinart TOA-95. For french fries, I use a stainless steel cutter or just slice them into wedges. I throw them in a bowl and add a tablespoon or two of peanut oil and seasoning. They cook in about 25 minutes and I flip them twice. Bacon cooks in about 8 minutes and chicken thighs (oiled and seasoned) are perfect after 18.

Speaking of french fries, for superior results, cook them three time. First, slice them and parboil in a pressure cooker for about 15 minutes. I use the Cuckoo CRP-P0609S. When done, immediately throw them in to an ice bath to stop the cooking. Then, pat dry and air fry for 13 minutes at 350F until they start to brown. Then spread them on a baking dish and freeze for at least a couple hours (or weeks). Air fry the frozen fries for 15 minutes at 375F et voila.

The pressure cooker is also great for cooking beans. I don’t soak them overnight and I don’t boil them for hours. 75 minutes in the pressure cooker (ratio water to beans 4 to 1) gets them ready.

I’ve given up on gas ranges with their pollution, and replaced mine with induction hot plates such as the Duxtop 9600. Induction is faster, easier to control, and easier to clean. I turned off the gas to my range, put a marble slab on top and set up a couple of hot plates. The only issue is that each one uses about 1800 watts, so they need to be on separate circuits. You might use a 20-amp extension cord for one of them, installed using a raceway, but your electrician can do a better job, if needed.

An electric wok is an amazingly versatile (and portable) way to cook vegetables, meats and stir-frys. I take mine out onto the patio to cook outdoors, so my fire alarms don’t alert. The Breville Hot Wok is best for many reasons. It’s heavy but that’s a plus. If you’re concerned about non-stick coatings, go with the Lodge cast iron and use it with one of the induction hotplates above.

For waffles, I mix up the flour, sugar, baking soda and salt in 1500 gram batches. Then I use about 300grams of mix with egg, oil, milk (or buttermilk), vanilla and cinnamon for a few days’ worth of batter that goes into the Cuisinart WAF-F40 waffle maker.

For boiled eggs, the egg pod is the first device I’ve found that actually works well.

For popcorn, the Cuisinart CPM-700P1 is the best I’ve found. Just be extremely careful and wear oven mitts when handling the bowl after popping. Others I’ve tried burned some kernels or blew popcorn and unpopped kernels beyond the limits of the bowls.

I will never again buy a refrigerator with a built-in icemaker. Leaking water inside your fridge is no fun. The cubes tend to escape their buckets into the depper recesses. The buckets are too small and difficult to maneuver. I’ve switched to a couple of Nugget Countertop Ice Makers, one upstairs and one downstairs. You could pipe them in, but I don’t have any problem filling them with pitchers of water. The ice melts after about 16 hours if you turn the machine off, but generally keeps a supply of ice ready for use at any time by recycling.

Don’t skimp on your coffee grinder. The Baratza products are noisy but produce great results. The Encore is for brewed coffe, the Sette is for espresso. For brewing coffee, nothing beats the Moccamaster.

For making ice cream, the Cuisinart ICE-21P1 is the only one I’ve found that works well. I use about half the amount of sugar in the recipes, maybe 3/4. The Ninja creamie was a disaster for me.

A vacuum sealer will save you lots of money. Use it to freeze leftovers. Make large batches of marinated meats and seal up usable portions to freeze for later. The “chamber” types are best, but very expensive. A top-of-the line Foodsaver like the Elite is a worthwhile investment. The cheaper models do not work as well.

A pasta maker like the Philips 7000 allows you to quickly and easily make a variety of fresh, delicious pastas: linguini, spaghetti, penne, orcchiette, lasagna etc. Just pour in the flour and add water. You can mix in egg if you want. You can mix up flours like semolina/durham, 00, whole wheat, all purpose and rice. The noodles will be ready before your water boils. It takes less than ten minutes and fresh pasta cooks faster than dried. Cleanup is tedious, but worth it. You can make 500g (5 goodly portions) at a time, and dry what you might use later.

With a rice cooker, all you do is pour in a cup of rice, add water and press a button. Zojirushi is the best brand, and they start at under $100. I’m crazy, so I bought the one with induction heating, fuzzy logic and the works that sells for about $900. The more you spend, the more you get in terms of perfect rice, but $50 gets you 90% of the way there.

Between the bread maker, rice cooker, pasta maker and air fryer you’ve got a different variation of starch for each meal. All unprocessed and chemical/preservative free.

Everybody understands the usefulness and versatility of blenders for everything from smoothies to soups. Vitamix and Blendtec are the gold standards, but there are some brands that are just as good or better, for less money. My Vitamix is in storage while I use the superior Waring Commercial MX1000XTX. With blenders, it’s all about the horsepower and the Waring has 3.5 of them. The result is the smoothest and most consistent drinks, sauces and soups.

I use a small food processor, the Cusinart Mini Prep, to make mayonnaise from eggs, salt, lemon juice, mustard and oil. A larger food processor like the Hamilton Beach is for chopping onions, celery and carrots for soffrito, mixing up egg or tuna salad, or pulverising blocks of cheddar cheese.

You only need to know two words about countertop mixers: Kitchen Aid. Some people swear by the Ankarsrum, but that’s an entire lifestyle.

If you think you know what goes into the ground beef you buy at the grocery, but you might be surprised. Once you start using a meat grinder, you’ll never buy pre-ground again. A basic one with multiple cutting discs will work just fine on a small scale. For ground beef, first grind using the large holes, then a second time with medium. (Small holes are for sausage.)

A basic meat slicer is worth having available. Watch your fingers!

Squeezing citrus for orange juice and lemonade can be done with an electric model or a manual one. I’m not sure which is better. A combination is probably best.

Salad spinners are genius. I have three of them, because they not only clean lettuce and fruit, they can be used for storage in the fridge. Just tear up a “dirty” head of lettuce into the basket and spray some vinegar on to disinfect. (I suppose that’s part of the reason it’s in dressings.) Then fill the bowl with water and slosh around to rinse. Empty the water and spin. Empty the water again and your lettuce is ready. Oxo is the best brand.

With a budget of $4,000 you can buy a complete set of these appliances. They will all last pretty much forever and will start saving you money on day one. Every restaurant meal you substitute with home-cooked will probably save $50 for a family of three. If these appliances make cooking easier or feasible for you, the payback might be a year or two at most, while saving you time and effort.

I’ll add more as I think of them.

Home Improvement Plan

Setting priorities when you move into a home

Everybody finds things to improve, whether their house is brand new or a hundred years old. Even in a custom-built home, there is always room for improvement. In this era of work-from-home and “quiet luxury,” we want to be comfortable while reducing negative impacts on the environment. Much of this can be achieved without extensive renovation, but the same ideas apply when remodeling.

In 2017 I bought a 1700 sq. ft. two-story home in Las Vegas. After six years I finally feel I’m near the end of making improvements (mostly DIY) and I can sit back and enjoy them. If I live in this house for another six years, most or all of the work will have paid for itself and I hope to sit back and enjoy it all for a little while longer. In the meantime, my home is more comfortable, convenient and cost-effective. with a smaller carbon footprint.

First, light bulbs

Home improvements should make your life better while returning concrete benefits that outweigh the cost. LED lightbulbs are one of the best examples. There are 75 light fixtures in my home. When I moved in, almost all of them held old-fashioned incandescent bulbs. 75 bulbs averaging 60 watts, running for 3 hours a day at US average $0.23 per kwh will cost over $1100 a year for electricity. Replacement costs as they burn out are also significant. LEDs consume about 1/10 of the power, so if they cost $1.50 each, that is paid back in a few months. They last much longer than incandescents so you’ll use that stepladder to change them much less often. In six years, I’ve replaced about 20% of them. If you have 5″ recessed ceiling receptacles use BR30 bulbs, for 6″ use BR40.

For outdoor, choose yellow bulbs to reduce attracting insects and save energy with dusk-to-dawn bulbs. For patios and garages, add motion detection.

Free stuff!

NV Energy gave me LED bulbs for free. They also replaced my old refrigerator with a brand-new energy efficient one. They paid for a smart thermostat that saves at least 10% of my electricity cost for air conditioning. They provided a rebate when I replaced my HVAC with a new energy-efficient system. The water company paid to replace my irrigation controller with a smart one that reduces usage and cost. Check with your utilities to see how they can help you conserve as you make improvements.

All of these things make my life more comfortable and more efficient. Include a regular amount in your monthly budget to implement improvements. Some of these tasks require professional assistance but if you’re a DIYer you might be able to handle many of them.

Checklist of tasks

Safety

  • For homes built before 2015 you may need to install one GFCI outlet on each circuit to reduce the risk of electrocution due to ground fault. Other types of protection such as arc fault are also available. Test all GFCI outlets regularly.
  • Replace all smoke detectors that are more than ten years old. Consider adding CO detectors as appropriate. Test regularly.
  • Deploy fire extinguishers/blankets as appropriate.
  • Consider escape ladders for upstairs bedrooms.
  • Be sure to lubricate/maintain your garage door regularly. Replace noisy metal rollers with nylon.
  • Bathtub handles/rails.
  • Replace over-range microwave with range hood. Install the microwave elsewhere. You need a range hood to vent cooking fumes, particularly from gas ranges. The cooking process itself, electric or gas, releases harmful pollutants. Be sure to clean the filters regularly.
  • I turned off the gas to my gas range and installed a slab of marble on top of it. That made room for some induction cooktops, which I find much more effective, without the toxic fumes.
  • Clean HVAC ducts (every few years) and dryer lint vent (every few months). Unless your house is brand new, this has probably never been done.

Cost-savings (long term):

  • LED lightbulbs. Payback in months.
  • Smart thermostat will save energy. Payback in less than two years.
  • Caulk/seal sinks, showers, tubs and windows to prevent costly leakage.
  • Insulation. Start with your garage door. Kits start at about $100. The cost payback is probably a few years but in the meantime your garage is cooler in summer and warmer in winter. Note: Adding insulation may require adjustment of your springs, which is a job for a professional.
  • Increased insulation for your attic might be cost-effective.
  • Curtains. These fall under the category of insulation. Blackout curtains block the sun during summer and keep in the heat during winter, the payback might be in a couple of years. In the meantime, you have beautiful window treatments to admire.
  • Sealing. Make sure doors and windows are not leaking air from the outside.
  • If HVAC is over 15 years old, replace with a variable speed heat pump or other system as appropriate. Seek out rebates from utilities and governments.
  • Water treatment. Don’t waste money on bottled water. Install a whole house treatment system. Try to get a system where filters last at least six months, don’t cost too much, and can be changed without calling in a plumber.
  • Under-sink water heaters. If you’re running 60 seconds of cold water until the hot water arrives, the cost will be paid back in a few years. In the meantime, you can have instant hot water everywhere.
  • A swivel faucet extender is a major improvement for most sinks.
  • Hang a squeegee in your glass-walled shower. It will eventually pay for itself in Windex savings and, more importantly, save you a lot of effort scrubbing glass after scum dries on there.
  • If your toilets are more than ten years old, they probably need to be resealed. Consider replacing them entirely, with modern low-flow toilets like Toto. Replacing involves about the same amount of work as resealing, so you might as well. A new toilet is less susceptible to costly clogs and repairs. It may also offer greater comfort with a slightly higher seat (look for “comfort” or “universal” heights 17-19″.) Modern toilets flush effectively with one flush and may have coatings that require less frequent cleaning.
  • The payback for a bidet might be as soon as your next visit to Costco, when you don’t need to buy any toilet paper. (Or bottled water, see above.) Prim Americans are still repulsed by the idea of squirting water on your butt, but don’t knock it if you haven’t tried it. You’ll never return to scratchy, smeary, costly, wasteful TP except in public restrooms or when you visit less savvy friends. Toto offers the very best, which may require some electrical work.
  • If kitchen disposer is less than 1 HP, replace with a stronger one that requires fewer repairs.
  • Countertop air fryer, small convection oven, microwave. Save your built-in oven for bigger portions.
  • Get a separate fridge for beverages to reduce opening/closing of main fridge doors.
  • High quality low flow showerheads, like Speakman, provide a better shower than the fancier ones, while using less water, and will last forever.
  • Replace washer and dryer if more than 15 years old, particularly if your utility will help with the cost.
  • Reinforce closet shelves with additional brackets as necessary. Flimsy contractor-grade brackets, as found in most newer builds, will not support a lot of weight. Don’t wait for them to collapse, taking chunks of your wall with them.
  • Solar panels should have a payback of no more than 12 years. Sooner than that, if utility rates continue to rise. See my blog.

The skills and tools required to “Do it Yourself” (DIY) are:

Basic skills for DIY:

  • Working in tight spaces
  • Lifting and maneuvering items that weight up to 35 pounds. (Twice that if you have some help.)
  • Operating water supply valves
  • Operating electrical circuit breakers
  • Climbing ladders
  • Drilling holes
  • Patience

Basic tools for DIY:

Stir Fry Chicken with Broccoli and Peppers

Chicken stir-fried with broccoli and peppers

Takes 20-30 minutes to cook (after 40 mins marinating chicken)

Ingredients

  • 2 lbs. chicken breast (slivered)
  • 1 tsp Salt (or as desired)
  • 1 tsp Sugar (brown preferred)
  • Broccoli florets, separated
  • 4 or 5 carrots, diced or sliced or julienned
  • 3 tbs Olive oil
  • 2-3 red fresno peppers, julienned, for less spicy remove seeds
  • 3 serrano peppers, julienned, for less spicy remove seeds
  • 2 amarillo peppers, julienned (optional for variety)
  • 1 bell pepper, julienned (optional for sweetness)
  • 6 small scallions (spring onions), chopped (or regular onion if you like)
  • a tomato or two (optional) seeds removed
  • 1-3 tbs Potato starch or corn starch
  • 2 tbs Chinese cooking wine (Shaoxing is best but any cooking wine will do.)
  • 2 tbs Soy Sauce (dark Tamari preferred)
  • 2 tbs Sesame Oil
  • 4 tbs Canola Oil
  • 2 cups rice

Instructions

Season the sliced chicken with salt and a little sugar, let sit in fridge for 20 minutes or more while you prep veggies.

Drizzle a little olive oil and salt on carrots and broccoli.

Make a slurry of starch and wine, pour over chicken, add soy sauce and a little sesame oil to chicken, mix well and marinate for 20 minutes or more while cooking rice.

Allow chicken and other ingredients to come to room temperature.

Heat a wok or large frying pan on high

Add a few tbs canola oil and heat until it just starts to smoke! Pan should be 375F or, preferably, hotter.

Fry chicken 90-120 seconds each side, adding a few more drizzles of sesame oil, wine and soy sauce to side of pan as desired, until golden and set aside. If your pan isn’t hot enough, cook chicken longer, thoroughly of course! Beware of hot oil spatter.

Stir fry the carrots and broccoli for 3-4 minutes until they start to brown, then a few minutes covered until soft. Set aside when done.

Stir fry remaining vegetables/peppers a minute or two. Beware pepper fumes, this is best done outdoors.

Add already-cooked chicken and vegetables to pan and stir fry for another minute or two.

Serve over rice.

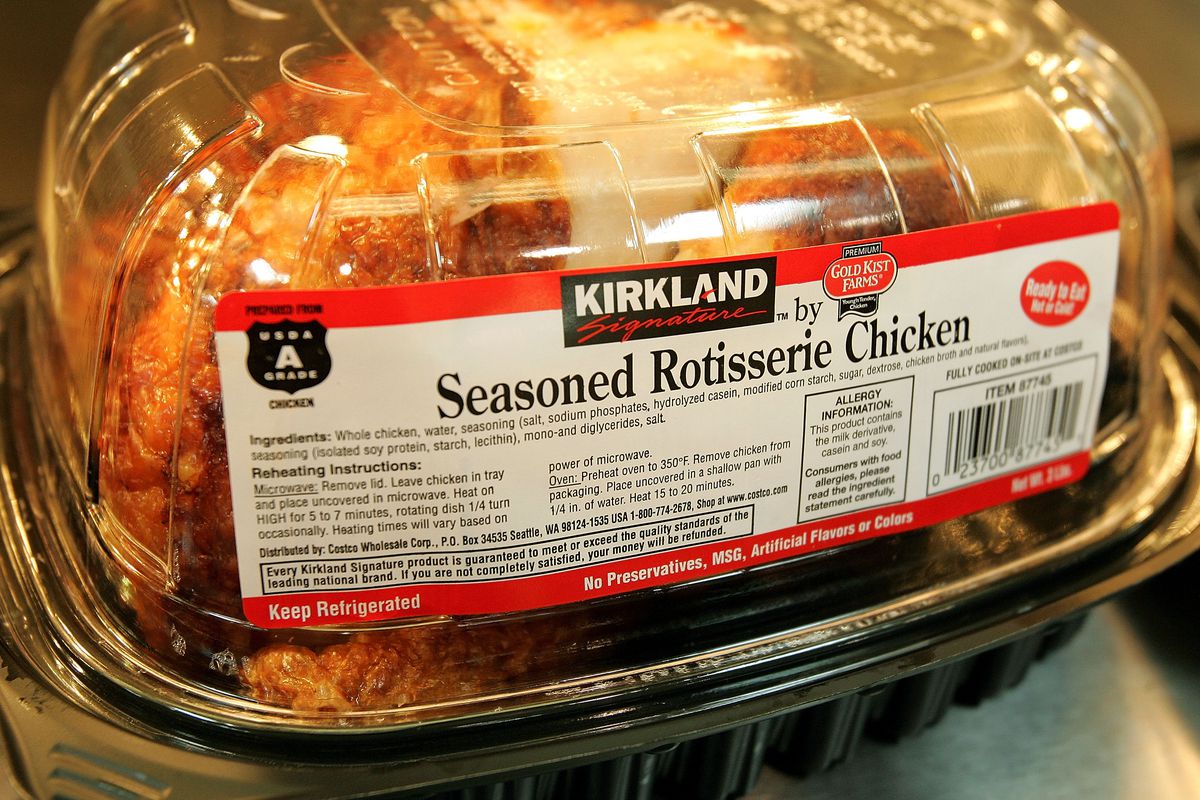
Recipe for Costco Chicken

What do I do with a Costco Chicken? Here’s a recipe that uses rotisserie chicken as the base.

Every day, Costco sells millions of rotisserie chickens for $4.99 each, losing money on every one. They’re delicious if you eat them soon after you get home, while they’re still hot from the oven. They lose considerable appeal after they’ve cooled off. The fat congeals, the skin becomes rubbery, and slices are bland and unappealing after just a few hours. Sandwiches, salads and soup are all good ways to use up the chicken after the first day.

Chicken Dinner

If you buy a Costco chicken in the morning or afternoon, you’ll need to get creative to serve it for dinner in the evening. You could reheat the whole chicken and serve it as is, but that’s a little unexciting. Here’s an easy way to liven it up considerably with minimal effort. The key is a lovely red hot sauce called El Pato.

El Pato Hot Tomato Sauce

Spicy Costco Chicken El Pato

Preparing the chicken takes about 20 minutes, and may be done a few hours ahead of time. Cooking can take less than 30 minutes, while rice is cooking. Longer cooking time (90-120 minutes) will improve the flavor by reducing the sauce.

Ingredients

  • 1 Kirkland Seasoned Rotisserie Chicken
  • 1 tsp kosher salt
  • 1 tsp ground black pepper
  • 3 Tbsp lime juice, fresh preferred
  • 2 Serrano Peppers or Jalapenos to taste (remove seeds to reduce spiciness.)
  • 16 oz El Pato Hot Tomato Sauce (I suppose you can substitute the hot sauce of your choice.)
  • 3 Tbsp cooking wine (optional)
  • 2 Tbsp olive oil
  • 3 small scallions (spring onions) or 1/4 yellow/white onion, chopped
  • 1 Bell Pepper
  • 1 large clove garlic, finely chopped
  • 3 cups white rice
  • Cilantro for garnish

Marinate the chicken

  • Remove skin, fat and bones from the chicken, and cut large pieces of meat into smaller pieces.
  • Season chicken with kosher salt and pepper to taste. Remember, the chicken has already been “seasoned” but not really sufficiently.
  • Pour lime juice over chicken.
  • Slice serrano or jalapeno peppers (to taste) and mix into chicken.
  • Pour hot sauce over chicken (more to taste) and mix well.
  • Add wine if desired.
  • Marinate for at least 20 minutes. 1-2 hours preferred.

Start the rice

I assume you’ll be cooking rice in a rice cooker, Instant Pot or pressure cooker, which will take about 30 minutes.

Fry the onions and garlic

  • Use more or less onions and garlic to your taste.
  • Add olive oil to large saucepan and heat to medium-high.
  • Cook onions for 3-5 minutes until they soften and become transparent.
  • Add bell peppers to pan and sauté for a minute or two.
  • Add garlic and cook for 1-3 minutes until it begins to brown.

Add chicken mixture to saucepan and mix thoroughly.

Simmer for 15-20 minutes until thoroughly hot, stirring gently occasionally. Avoid shredding the chicken. You can cook longer if desired and it will get better as the sauce is reduced. 60-90 minutes is a good cooking time.

Serve over rice. Tortillas optional. Garnish with chopped scallions and cilantro.

I promise it tastes better than it looks.

Going Solar, Part Six: Results!

West-facing panels, note anti-pigeon fencing

We have ignition!

NV Energy replaced my meter and gave me thumbs up on January 6, so I pulled the handle to connect my panels to the grid and my home. That afternoon, the panels generated 4.441 kWh of AC energy. The first full day was 18.292 and we were just getting warmed up as the days after that registered 24 kWh or more per day. Overall trend was increasing production as days grew longer.

January 2021

I started getting data from NV Energy on 1/16/21 so for the last 16 days of the month I know I received 370 kWh from the grid and delivered 200kWh of solar power to the grid. My total consumption of electricity for those 16 days was 529 kWh, so by my calculation the panels saved about $20. Add in the 10 days without data and I may have cut my expected $65 bill to $35. I’ll let you know exact numbers after I receive my first bill.

These numbers are in line with the estimate from my solar contractor that my panels would generate approximately 628kWh every January. From 1/6-1/31 (25.5 days) they actually generated 593, average 23 per day. 23 x 31 = 713 for a conservative estimate of what total January production might have been. PVWatts was a little optimistic predicting I might generate 902 kWh, but they apparently assume mostly-sunny days, whereas about 1/3 of the days this January were cloudy or partly cloudy. Daily production ranged from 8 kWh to 36 kWh depending on amount of sunshine.

Is it worth it?

Considering that I made the first of 144 loan payments of $182.71,saving $30 on my first monthly bill might not be cause for much celebration. Fortunately, the savings should be much greater in warmer months, and the up-front $5800 tax credit reduces the cash flow pain significantly.

A lot depends on how much I get for delivering excess solar power to the grid during summer peaks. In July I should be able to generate 1500 kWh and deliver much of that back to NV Energy for about 22 cents per. That’s a big chunk of change if I use the AC sparingly during peaks and don’t crank it up too much in the off-peak hours.

The future

Assuming my installation proves reliable and free from major maintenance costs, most other factors seem likely to increase cost-effectiveness of my investment:

  • Electricity rates increase
  • Public perception of the value of solar panels increases

One factor, however, will reduce cost-effectiveness

  • Summer days grow hotter. Solar panels lose approximately 0.3% efficiency for every degree Fahrenheit above 77F. At 100F they will produce approximately 7% less than they would under similar conditions at 77F.

Meanwhile, I can take some satisfaction that I am reducing my carbon footprint (particularly important in US with its inefficient carbon-based generating plants) and have somewhat limited the risk of climate-related impact on energy costs for my home. After one month of production, my monitoring program cheerfully informs me I’ve saved the planet from 1,222 pounds of carbon, the equivalent of planting 9 trees.

At this early stage, it appears I may go a very long time without paying anything for electricity. I will have to pay a small monthly fee to remain tied to the grid.

First Bill (January)

Today I received my first post-solar bill from NV Energy. It covers the day of installation (1/6/21) to 1/28/21, 22 winter days. The combination of TOU Rates and Solar Power are saving a lot of money.

The grid delivered 423 kWh and the panels sent 323 kWh out of about 500 kWh generated from solar panels to the grid, for a net 100kWh billed at full rate, total $6.25. Various fees on the full 423 kWh were $1.36. Electricity costs total $7.61 or $0.35 a day. The base service was $9.53 for the partial month, making the total bill $17.24, an average of $0.78 per day.

Last year my daily average was $2.24, $1.46 more per day. This year we are using a lot more electricity due to the pandemic. Last year we used about 15 kWh per day but this January we used almost double, 27kWh per day.

27 kWh at full rate would have been about $1.69 per day (base service additional.) TOU saves about $1 of that. My original projected solar savings, pre-TOU were $0.12 per day, so it looks like my projections were very conservative.

These numbers will be very different in summer (June-September), when costs and savings (in sunny hot Nevada) will be higher.

Conservation during peak hours will be more important.

February, 2021 (Saved $57.00)

For the period 2/1/2021-2/28/2021, my solar panels generated 971kWh. That exceeds the estimates from PVWATTS (924) and my contractor (790). I used 449kWh from the grid and sent back 703kWh for a net of 254kWh to my credit (for use in summer.) My total consumption was 717kWh (971-703+449) which would have cost $47.11 from the grid. Instead my bill was an effective credit of $9.89 for a savings of $57.00.

“Saved” noted for each month does not consider monthly loan payment of $187.19 (12 years @ 2.99%) or tax credit of 26% (about $5880).

March, 2021 (Saved $71.44)

Solar panels generated 1274 kWh. This exceeds the estimate from my contractor (1100) but didn’t quite reach PVWATTS (1278). I used 486 kWh from the grid and sent back 993 kWh for a net of 507 kWh to my credit. The credit does not go toward the base (about $15) but it pays for electricity including basic delivery fees for the grid (about $1.50 for the 486 kWh). My accrued credit so far is about $30 which will probably be used up in summertime.

In March my total consumption was 767 kWh (1274-993+486) which would have cost $50.37 pre-solar, but combined with my credit of ($21.06) makes a total savings of about $71.43 for March. This is based on TOU rates which are about half normal rates from NV Energy during non-peak hours.

April, 2021 (Saved $83.76)

Solar panels generated 1475 kWh. This exceeds the estimates from my contractor (1386) and PVWATTS (1404). It was was a sunny, cool month with only 2 or 3 overcast days in Las Vegas.

I lost 1/2 day production due to inverter malfunction. A simple reset fixed it, and it was a good reminder to keep an eye on it every morning.

I used 549kWh from the grid and sent back 1139kWh for a net of 590kWh to my credit. My accrued credit so far is about $55 which may be used up in summertime.

In March my total consumption was 889kWh (1475-1139+549) which would have cost $58.45 pre-solar (TOU rates), but combined with my credit of ($24.35) makes a total savings of about $82.80 for March.

Last year’s bill was at standard rates, before I discovered TOU. At standard rate (0.1134 incl tax) my electricity cost would have been $100.81! So I saved $42.36 by using TOU rates, and $82.80 from solar for a credit of $24.35. Last April’s bill was $128.20 for 1136kWh, this year’s was $13.18 (for the base).

May, 2021 (Saved $98.76)

Solar panels generated 1638kWh. This exceeds the estimates from my contractor (1512) and PVWATTS (1404). It was was a sunny, warm month with only 2 or 3 overcast days in Las Vegas. The average of almost 53kWh per day is probably getting close to maximum production from my 7.92kwP system for any month. Production usually peaks from 6-7 kWh around noon, with occasional spikes above 7. Those spikes may be due to a passing cloud cooling the panels followed by a burst of intense sunlight on the cooled panels.

I used 789kWh from the grid and sent back 1112kWh for a net of 323kWh to my credit. My accrued credit so far is about $65 which will be used up for summertime air conditioning.

In May my total consumption was 1314kWh which would have cost $86.34 pre-solar (TOU rates), but combined with my credit of ($12.41) makes a total savings of about $98.76 for March. (Keep in mind, however, I am paying $188 a month on my solar loan.)

June, 2021 (Saved $188.37)

It seems likely that I will make it through the hot summer in Las Vegas without paying for electricity from the grid. My 7.92kWh system, in combination with Time-of-Use (TOU) rates, produces enough to keep a lid on my bill from NVE, even under less-than-ideal conditions. That bill had been hovering around $250 a month last summer. Our consumption this year was a bit higher due to the unusually hot June.

Achieving the Solar Dream: No cost for electricity from the grid!

Based on results so far, it seems unlikely that I will ever pay for electricity during the 20-year life of my Contract with NVE. I still have to pay a basic fee of about $14 per month to stay connected to the grid for backup.

Production was 1,420kWh, lower than predicted by my contractor (1,511) and PVWATTS (1,498). I lost a full day on June 21 when my system simply blipped out. Maybe it was celebrating Summer Solstice. Service techs mumbled something about a firmware update for my inverter. Production was also affected by hot, hazy days. On days that reach 110F my system struggles to hit 50kWh. Throw in some hazy, downright cloudy days and the average was 49kWh per day for 29 days. High for the month was 57kWh on June 10, low (other than the zero day) was 22kWh(!) on June 23. Still, enough to eliminate electricity charges from my utility, but not much of a credit going forward.

The nice thing is

even on days of relatively low production, most of the solar generation occurs during peak hours, so negative impact on bill is minimal

Summer means Time-of-Use rates

Summer TOU electricity rates arrived June 1 and will continue through September 30. During peak times (1-7pm, Mon-Fri) I will be charged about $0.347 per kWh delivered from the grid, and credited about $0.283 for each kWh the grid receives from my solar panels. Off-peak the rate is about $0.053 per kWh delivered and about $0.042 received. At those rates, during peak hours I want to “sell” as much solar as I can to the grid, and avoid using electricity for appliances. Dinner preparation now begins at 7pm. I’ve set my Nest thermometer to pre-cool the house to 75F between 11am and 1pm, then set to 81F from 1-7pm during peak. Even on days that reached 108F outside, The air conditioning didn’t kick in until around 5pm and then ran for about an hour between 5 and 7, when the thermostat goes back to its “normal” 79. That’s probably about the best I can do without letting it get uncomfortably hot in afternoon, and the result is that the grid is receiving 8-9 kWh net during peak each day. That seems to have generated enough credit to eliminate the cost of electricity from the grid for the summer months. Fingers crossed! If I really wind up generating that much excess credit, I can perhaps set the thermostat at 79 instead of 81 during peak (still pre-cooling from 11am-1pm) and use up more of that solar power.

July, 2021 (Saved $180.96)

Production was 1,390kWh, lower than predicted by my contractor (1,504) but a little higher than PVWATTS (1,373). Production was affected by hot, hazy weather, including a couple of days of monsoon rains and overcast. High for the month was 53kWh on July 1, low was 29kWh on a rainy July 30. This was my first bill that did not generate a credit going forward. I used about $15 of my built-up credits to pay the overrun, leaving about $60 credit to get me through the summer. Two months left of summer peak pricing!

Lower utility rates = lower savings

Nevada Energy actually lowered their TOU rates a little bit in mid-July. I can’t complain about that, but it does mean my solar installation “savings” were a bit lower than they will be when rates go up.

I’ve learned that house guests aren’t good at saving electricity during summer peaks. They need their A/C!

“OK Google, cool down the nest,” was a frequent refrain as the inside temp approached the pre-set 81 in the afternoons.

August 2021 (Saved $190.19)

Production was 1,450kWh, a bit higher than predicted by my contractor (1,435) and PVWATTS (1,371). I used about $10 of my built-up credits to pay the overrun, leaving about $50 credit to get me through September. It may be a long time before I pay anything for electricity.

September 2021 (Saved $175.94)

Production was 1,366kWh, a bit higher than predicted by my contractor (1,233) and PVWATTS (1,307). I received a credit for my excess production, leaving about $70 credit at the end of the summer. My projections are that I will not pay for electricity during the expected life of my solar panels, 25 years.

From January-May I accumulated a credit of $65.01 by selling excess solar production back to NV Energy at 75% of retail rate. Over the summer, I added $12.90 credit for a balance of $77.91 at the end of September. NV Energy allows me to carry this credit forward indefinitely, so it may come into play as productivity of my panels decreases over the years.

Not every utility will pay you for excess production, or allow you to carry over credit balances year-to-year

October 2021 (Saved $64.21)

Production was 1,057kWh, a bit higher than predicted by my contractor (1,003) and a bit less than PVWATTS (1,101). I received a credit of about $11 for my excess production.

November 2021 (Saved $53.94)

Production was 855kWh, a bit higher than predicted by my contractor (769) and a bit less than PVWATTS (938). I received a credit of about $1.00 from NVE for my excess production of about 22kWh.

December 2021 (Saved $44.65)

Production was 689kWh, a bit higher than predicted by my contractor (655) and quite a bit less than PVWATTS (817). I used about $13 of my accumulated credits to pay the current cost for the net 215kWh delivered by the grid.

2021 Year-End Summary (Saved $1,212.79)

I didn’t turn on my panels until January 6, 2021 so this summary doesn’t quite cover a full year. I calculate my savings as what I would have paid for the same electricity at current rates versus what I actually paid (which was zero in 2021 versus $1,331.19 in 2020). I think this is more meaningful than comparing one year’s bill to the previous, with so many factors such as rates and weather subject to change. My electricity consumption in 2021 was about the same as 2020, a little over 14,000 kWh. As planned, my solar panels matched that, generating 14,120kWh.

Although I say I paid zero for electricity in 2021, I actually generated a credit of about $75 to be applied to any future costs. (I also pay a base fee of about $13.50 per month for my grid connection.)

Implementing solar added incentive to a switch to TOU rates, which probably saved about the same amount of money as the solar generation. I was able to time-shift usage so I never paid peak rates; all my cost was at reduced off-peak rates. Much of my summertime surplus was sold back to the grid at the higher peak rates.

Federal tax credit: $5882.94
Electricity Savings: $1247.42
12 loan payments of $187.12 each (12 year loan) = $2245.44
Positive cash flow (assuming I could use the entire tax credit): $4884.92.
Plus I paid down my 12-year loan and I have an asset value ($23,000 solar system) that should outlive the loan.
Plus I am doing a small part in the battle against greenhouse gases. This first year should have paid off the “carbon cost” of manufacturing, transporting and installing the system.

My solar panels act as a reassuring hedge against rising utility rates and hotter summers. In effect I’ve paid for future (inflated) costs at today’s dollars and low interest rates.

April 30, 2022 update

So far this year, my panels are producing about 5% more than they did last year. Probably mostly due to sunnier weather, but also improved by removal of satellite dish that was casting a shadow on two panels.

2022 Year-End Summary (Saved $1,431.38)

In 2022 my panels generated 14,701kWh, 4% more than they did in 2021, probably due to more sunshine. My energy consumption was 15,980kWh, 8% more than in 2021, due in part to my developing interest in cooking and baking. I’m also entertaining more energy-sucking guests post-pandemic. With energy costs soaring, savings will increase. A 14% increase in NV Energy electric rates goes into effect 1 January 2023. My original cost projections to justify going solar assumed 3% annual increases, which now seems low. For two years I have not paid a penny to the utility for electricity, only the $14 monthly connection to the grid. Payback on my system seems to be about 8% per year, or 12.5 years, about as expected. Rising rates/usage will tend to reduce payback time. 14% annual increases in rates would reduce payback time to about 9 years.

2023 Year-End Summary (Saved $2,031.50)

In 2023, my panels generated 14,537kWh, 1% less than they did in 2022, mostly due to more cloudy El Niño days. Deterioration of the panels seems to be as expected, around 1.2% after three years. The sunniest day in December 2021 (the 26th) produced 29.48 kWh, while the sunniest in December 2023 (the 24th) produced 28.78 kWh, about 2% less.

My energy consumption was 13,822 kWh, 14% less than in 2022, due mostly to a new HVAC system including a 17seer heat pump. With energy rates soaring, my savings (what my bills would have been without solar versus actual) increased to $2,031.50 for 2023 from $1,431.38 in 2022. My original cost projections to justify going solar assumed 3% annual rate increases, which now seems very low. Payback on my system now seems to occur after 8.5 years. The increased savings are despite using less electricity, which would be expected to reduce the differential.

For three years I have not paid a penny to the utility for electricity, only the base $14 monthly connection to the grid.

Considering my loan payment of $183/month and counting the tax credit as cash, cash flow was positive on day one, has remained positive ($3790.10) through 2023 and will continue positive for the life of the panels, assuming they survive the 12-year loan without significant maintenance. I have not yet experienced any maintenance costs for my solar power system, which is still mostly under warranty FWIW.

January 1, 2024: New rates

NV Energy has implemented new rates that may disproportionately affect solar users. The monthly base rate, that all users must pay, is going from $12.50 to $18.00 plus tax, a 44% increase. To compensate, they are reducing rates for usage of electricity. Non-solar users will see little or no net increase in their total bill. Solar customers on net metering will also be charged less for electricity they use, but will receive less credit for electricity delivered to the grid. The result will be higher out-of-pocket costs for solar users. The extra $5.50 a month I pay for the base rate will subsidize customers without solar panels, keeping their bills (temporarily) stable.

Going Solar, Part Five: Panels on!

Nearing the finish line.

Thursday-Friday, December 3-4, 2020, workers installed 24 solar panels on my roof, and associated electronics such as an inverter in my garage and circuit breakers on the outside wall. I wish I had asked them to remove two old unused satellite dishes, one of which may cast a small shadow on the panels. Thought of it too late. (Update: I’ve removed the dishes and production increased by at least 1%.)

East-facing panels. Photo provided by contractor … crops out sat dishes

Not done yet!

The system may be completely installed but it still has to be inspected and approved by the local jurisdiction and then the utility company, before it can be turned on.

County inspection

Two days after installation, the county inspector stopped by to take a quick look, particularly at the electrics on the ground. I’m not sure he was concerned at all about the actual panels. Anyway, he approved, so two things were set in motion: the utility company was notified and the credit union loaning the money sent a contract to be signed, with a first payment due in about 30 days.

Utility inspection/meter installation

The next day I received an email from the utility with a form for me to sign. They promised to be out to inspect and install a new meter (if needed) within about 20 working days. Eight working days later I got an email saying my “application” was approved and they would send someone to my location (I need not be present) within 10 working days. With Xmas and NYE in between, that will be about January 6, 2021. About 131 days between formally starting the process and turning on the system, if all goes well.

My biggest mistake

Looking back, the only avoidable delay might have been while I waited patiently for HOA approval. I didn’t realize that, according to the rules of the HOA, if 30 days go by after I submit a request, and they have not gotten back to me, I can consider my request as approved. Instead I waited patiently for more than 45 days before I started playing hardball with the HOA to get approval. I’m glad they finally provided a letter of approval, but I should have asked the solar contractor to proceed after 30 days passed, as if the HOA had granted approval.

Do your part

I cannot overemphasize that if you have questions or concerns, deal with them before you sign the pertinent contracts. Don’t expect much flexibility or responsiveness once they have the signed papers in hand. Fortunately, I don’t have any major gripes so far. On the other hand, I have had some minor questions and requests, and I hoped the original sale rep would have continued to be my advocate. I haven’t heard much from him since I signed the sales contract. Others in the office have been more attentive, and things have gone about as smoothly as one might hope for. I did make a point of staying on top of things and in communication with whoever would talk to me.

Next post will hopefully be after the system is “energized” and I can start seeing results.

Going Solar, Part 6: Results!

Going Solar, Part Four: Snags and Glitches … Overcome

The dreaded HOA

Ten days ago, nearly two months since I embarked on this adventure, I was ready to throw in the towel. For the first time, I wanted to cancel the whole thing.

I received and signed the loan application provided by the nice credit union. Then I noticed that it included their right to put a lien on the “property” which I figured meant the solar panels I was financing. I had made clear to the solar salesperson that I did not want to see a lien on my house, and he assured me there would only be a UCC contractor’s lien on the panels, not the house. A closer read of the agreement (right after I signed it, duh) seems to define the “property” as my house! A frantic email to my sales rep remains unanswered ten days later. Fortunately, if worst comes to worst, I’m prepared to pay off the loan at any time. The $1500 fee (points) will hurt if payoff happens any time soon.

[The final loan paperwork, which I received after installation, clarified the lien is a standard contractor’s lien, only on the solar equipment, not on my house. I guess it makes a difference. The wording on the first document was unclear.]

As push was coming to shove, my HOA was giving me the silent treatment on my application, which had been filed more than a month earlier. Without their approval, I thought, I might have to delay installation until next year, losing 15% of my tax credit. Suddenly I faced the prospect of paying $5000 more in taxes for 2020, and a reduced rebate in 2021. (Congress later extended the 26% credit through 2021.) I also contemplated attorney’s fees if I decided I needed some professional help with my burgeoning issues.

I had foreseen difficulties with my HOA but my solar rep had promised to give them everything they needed. That, I realized, was a bit short of promising to take care of the HOA on my behalf. For their part, the HOA claimed they could speak only to me about the matter, not my authorized rep at the solar contractor. The salesperson didn’t return my emailed pleas for help. In fact, I don’t think I’ve heard a peep from him since I signed the sales contract, but what did I expect?

I contacted the Nevada Energy Commission, who enforce the state laws on solar panels. I heard right back from them, that they could help me only after my application had been declined by the HOA. There was nothing they could do if the HOA simply ignored me. Catch-22!

Fortunately, other staff at the solar contractor sensed my panic as we talked about scheduling the installation. They called the HOA and extracted a promise to make a decision “by the end of the day.”

Meanwhile, I took a close look at the CCRs (rules and regulations of my HOA) and saw that they promised a decision within 30 days on any application. If they didn’t respond within 30 days I could assume my application was approved. This would give me some leverage, at least.

That “end of the day” went by and two days more but I finally got the approval letter from the HOA. Things are back on track for a mid-December installation.

Next: Panels On!

Going Solar, Part Three: Waiting for permission

What to do while you’re waiting

The adventures of installing rooftop solar panels on an existing home

Now we wait. Whiling away the hours by reading the warranties and contracts.

HOA

My homeowners’ association (HOA) must approve any changes I make, particularly regarding the exterior appearance of my home. In Nevada and other states, the HOA’s ability to keep me from installing solar panels on the rooftop is limited by legislation meant to encourage renewable energy. As I understand it, they cannot refuse to allow panels. They may, however,  require changes that might reduce the output of my system as much as 10%. That would put a real dent in my payback. They may also take their sweet time, up to 45 days according to Nevada Energy Commission, to approve my application. I’m on day 28 now. 

[I later learned that the regulations of my HOA allow that if I make an application and get no response, after 30 days I can assume it’s approved. I wish somebody had told me to take a closer look at the HOA CCRs.]

At request of my solar provider, the HOA sent me a standard application form. Among other things, the form asks for the signature of all my surrounding neighbors indicating if they “approve” or “disapprove.” In the case of solar panels, it’s my understanding that the neighbors’ approval is not required. In my case, getting neighbors’ signatures is complicated. During a pandemic it doesn’t seem a good idea to go door to door getting signatures. Also, the homes around me are rentals and it might prove daunting to try to get approval from out-of-state owners. I filled in “Unable to obtain due to COVID-19.”

The solar provider filled in “December 3” for the installation completion. That’s more than twelve weeks away but we all hope it will be sooner. They don’t get paid until I sign off on the installation.

Building permits

City, County and other authorities must approve the plans before installation begins. This can take 8 weeks.

Warranties

I’ve been reviewing the warranty information provided by the solar contractor. With the exception of the roof, they’re standard manufacturers’  warranties.

As always with warranties and their loopholes, you’ll be dependent on the good will of the company to stand by their product, assuming said company still exists in 10, 20 or 25 years. The average lifespan of a US company is only about 10 years.

Photovoltaic Modules: 25 year workmanship warranty / 25 year 90.76% power warranty / 25 year labor warranty. Manufacturer warrants the power output will be no less than 97% of the designated Maximum Power (Pmax) stated in the product data sheet for the first year from date of purchase of the Product by the Customer and the Power output degradation will be no more than 0.26% per year for the following 24 years, so that, at the end of 25th year, the power output will be at least 90.76% of Pmax.

Translation:

Panels tend to produce less power as time goes by. Many panels degrade to 80% capacity or less after 25 years. Mine are “warrantied” to produce at least 90.76% during their lifespan of 25 years. Except, not really.

For one thing, they claim a margin of error of +-3%, so they’re really only guaranteeing 87.76% over the course of 25 years, not 90.76%, and that 3% “deduction” starts at year one.

The way they get to that 90.76% figure is somewhat convoluted, and of course unfair. Let’s say something worth $100 depreciates 10% per year. The first year it will lose $10 and be worth $90. The second year it will lose 10% of the $90 or $9, and be worth $81. After 25 years you’d still have $7.98 left. The way the panel manufacturer calculates it, you’d lose 10% of the original value each year, and would be down to zero after just 10 years. That’s how a rate of 0.26% per year goes from 100 to just 90.76 in 25 years, whereas if properly calculated it would be 91.12. Of course that difference is insignificant compared to their +-3% ringer.

In any case, an underproducing/defective panel may not be replaced with a new one, or even a refurb. Rather, the manufacturer can choose to refund the “value” lost. As I understand it, if a panel is only producing half the power it should, they’ll refund half the cost of the panel. This will probably be small comfort as you dig deep into your pocket to replace it.

If my “superior” panels turn out to have a lifespan no better than the “inferior” models, and is at only 80% after 25 years, if I’m lucky they’ll refund 7.76%, a paltry sum. Their brag about superior lifespan may be true, but it’s not backed up by much of a warranty, at least on paper. They’re no dummies!

Inverter: 25 year workmanship warranty

Power Optimizer: 25 year workmanship warranty

GSM Kit: 5 year prepaid plan (extendable at expiration). This is the communications module for the system monitoring app. GSM provides a cell-phone signal to facilitate remote monitoring. My understanding is the module includes WiFi so I can monitor without paying for the GSM signal. Typical costs for this kind of GSM service are $10 a month, which would weigh heavily in any calculation of return. I hope I won’t need it.

Mounting Racks: 25 years

Contractor Labor and Roof: 25 years. For the duration of the roof warranty, contractor is guaranteeing it’s roof penetrations to be watertight under any weather conditions. In case of a roof leakage after the expiration of the home’s original roof warranty homeowner must prove that the  leakage is actually caused by contractor’s roof penetrations.

Part Four: Snags & Glitches … Overcome

Resources:

PVWATTS calculator

Rough Draft of my spreadsheet. Click “Assumptions” tab after opening.

Going Solar, Part Two: A Secret Way To Save

Secret to me, until now: Time of Use Rates

Solar Panels are good for the environment of course.

The adventures of installing rooftop solar panels on an existing home

There is much to learn! Like Time of Use rates.

Since I posted “Part One” I have had my roof inspected by the solar provider. One cracked tile was found, which they will replace, and they report “the felt is good.” They took photos of all aspects of the roof. I suppose I should get a copy of those. [Advice: ask for anything special as soon as possible, preferably before signing the contract. I requested photos after the fact and was ignored.]

They say they will be providing a 25-year warranty on my roof. That protects against leaks from the points at which they attach their panels to my roof.

Meanwhile I’ve been refining the numbers on my spreadsheet. Savings each month will vary according to how much solar is used and how much is taken from the grid. It is not simply the total generated minus the total used, because I only get a credit of 75% retail from the utility. (This varies greatly from place to place.) So the more I use solar instead of the grid, the less I pay. I can calculate a maximum savings (all solar used, none sent to the grid) and a minimum (no solar used, all sent to the grid). For projections, I’ll use a figure midway between those two points.

Solar is not a substitute for conservation.

Solar panels on your roof does not mean you should use electricity with abandon. In fact, you should be conserving energy whether or not you go solar. You may find you save so much money by conserving that adding solar panels is unnecessary or not cost-effective. You need to compare the cost of solar versus your energy use AFTER employing conservation measures, not before.

Change all your non-LED light bulbs.

LEDs use about 1/10 the amount of electricity as old-fashioned incandescent bulbs. They last much longer, and the payback on replacing old bulbs is only a year or two. Your local utility may even provide some new light bulbs for free.

Turn off outdoor lighting during the day.

You can use LED light bulbs that turn themselves on when it’s dark. Be sure to get the dark yellow ones that don’t screw up the insects and birds. Ordinary LED bulbs may be screwed into sockets that are only on in the dark. Your local utility may provide some of these for free or at a substanial discount.

Use smart outlets.

Many appliances use electricity even when they are off. Shut them down as much as you can. For instance, kitchen appliances may be plugged into smart outlets that automatically turn themselves off overnight or during peak hours when electricity rates are higher.

Seal doors and windows.

Plug up the cracks that allow cooled or heated air to escape.

Replace old appliances.

Refrigerators, dryers, hot water heaters and air conditioners that are over 10 years old are probably wasting energy. Your local utility may provide replacements for free or a substanial discount.

Install a “smart” thermostat.

Something like the “Nest” can reduce your electic usage by identifying times when you can be cooler or warmer. You can set it up to “pre-cool” your house on hot summer days, so you use less energy during peak times. Your local utility may provide a smart thermostat for free or a substanial discount.

Time of Use Rates

My research led me to something called “Time of Use Rates“. This is a plan that might provide savings to almost anyone, but especially for those with solar panels and a bit of discipline. Or it might be a total loser for those who’d rather not think about how/when they use energy. I’m going to give it a try, and I’m told I can cancel after 12 months and get a refund for any overage. All I had to do was notify NV Energy that I’d like to try those rates.

Basically they charge more (3 times as much, about $0.35/kWh!) for energy from the grid 1pm-7pm during summer weekdays. At all other times (nights, weekends, wintertime) I pay about half the standard rate, $0.06/kWh. Sounds like if I’m willing to sweat a little during the summer weekday afternoons, I can cool things off at night while saving money, perhaps 25-30% of my bill even without solar.

While I pay lower rates during non-peak hours, I also get paid less for solar fed to the grid. That means the credit I accrue in the wintertime (in Nevada) yields less for me to apply against high electricity costs in summertime, when I’m using my air conditioning a lot. I think it will work out if I can strictly limit use of air conditioning during the daytime peaks. Then I’ll be gathering high credits for my excess solar, and paying for all the heavy usage at night. My hope is to avoid paying anything for electricity, which might save hundreds of dollars in summer months. That might be more difficult without TOU rates.

Shift your usage!

In summer, TOU rates from 1pm-7pm (depending on your utility) may be outrageous. Avoid using appliances and air conditioning during peak. Dinnertime should be after peak to avoid using cooking appliances during peak. No dishwasher, washer, dryer etc. Pre-cool the house down to 75° or lower during the hour or two before peak, then turn the thermostat up to 81° or higher until non-peak rates. Today it was 106°. From 1pm to 4pm the inside temperature drifted up from 75 to 81 and the aircon kicked back on. It didn’t take much to keep it below 81 from 4 to 7. Once beyond the peak time, set cooling for comfort all night.

In wintertime, when TOU rates are low all day long, shift appliance usage to the time when your solar panels are producing the most, 10am-3pm. For instance, start your dishwasher at 10am. Start laundry at noon. If baking in an electric oven, start that before 2pm.

Of course your peak rate times may differ from mine, but the basic concepts apply.

At this time it looks like TOU rates might cut $30-60 off my monthly bill, but may be even more beneficial once I switch on the solar.

“Time of Use” rates only make sense if you’re willing to adapt your usage during peak hours. Exact times vary. Avoid use of cooling during peak hours. Pre-cool before high rates kick in.

If you run your air conditioning all day long during peak hours, your electric bills will be high, with or without solar.

My solar rep never mentioned “Time of Use”, probably because it might reduce my existing electric bills, thus reducing the cost-effectiveness of installing solar panels. When I asked him about it, he replied, “I think that is a great idea for everyone who has a solar system on their roof.”   

In California, solar users who employ “net metering” to sell power to the grid must also adhere to “Time of Use” rates. There’s an article at Energy Sage but I can’t vouch for its accuracy, nor the comments.

Compare solar to what your electric bill should be, not what it is.

If you reduce your electric usage through conservation, you will need a smaller, less expensive solar panel setup. This affects costs and payback.

If you lower your bills by adopting better rate plans, it may be more difficult to justify investment in solar.

Don’t skimp on capacity.

Your objective is to produce as much electricity each year as you use. If your system produces too much, you’ve paid for capacity that has a relatively poor payback. Too little and you wind up shoveling too much cash back to the utility. Given the basic costs of designing and installing the system, don’t skimp on capacity.

Some solar contractors may low-ball your system capacity in order to provide an attractive price. 80% of use seems to be their sweet spot, but this is detrimental to your long-term payback.

Get an inverter that matches your panels’ capacity

The “inverter” is one of the more expensive parts of the system. It converts the DC power from your panels into AC power for your home (or to sell to the grid.) If you have 7.2kWp capacity in your panels, you don’t want an inverter limited to 5.6kWp. You want a more capable, more expensive inverter that is matched to your panels, including perhaps a few extra kWp if you decide later to expand.

Part Three: Waiting, and what to do while you’re waiting

Resources:

PVWATTS calculator

Rough Draft of my spreadsheet. Click “Assumptions” tab after opening.

Going Solar, Part One: Up on the Roof

Solar panels can be fun!

The adventure of installing solar panels on an existing home

Follow this blog as I learn things no contractor will ever tell you.

Takeaway: Recommendations when purchasing solar

These apply to most people considering purchase of a solar generating system:

  1. Purchase, don’t lease.
  2. Choose an on-grid system and avoid the (high) cost of batteries.
  3. Match the power of your system to the electricity you consume. To compete, many contractors low-ball systems that provide 80% or less of your annual usage. Aim for 100% or even a little more.
  4. Investigate the net-metering options from your utility. A net-metering return of 60% or more for your “excess” production is desired. Otherwise, consider going off-grid, which is beyond the scope of this blog.
  5. Investigate time-of-day rates from your utility. They may save you so much that you don’t need solar at all. With solar and net-metering, T-O-D rates can generate a lot of savings.
  6. Expect payback within 12 years; otherwise you’re overpaying. Calculate your payback by comparing your expected bills versus what your actual bills would have been. Rising electricity rates accelerate payback. Your bills in 10 years will look much different from what they are today.
  7. Be careful about your roof. Don’t put panels on a roof that needs replacement soon — it will cost a lot to pull them off and reinstall them.

It is more complicated than I thought it would be, but probably it’ll be worth it.

I pulled the trigger yesterday (August 28, 2020) and arranged the first concrete step toward installing rooftop solar panels: the site inspection. The solar company will be out to take a look at my roof. They’ll make sure it’s structurally able to support the panels, and that the angles, inclinations, tilts and azimuths will provide sufficient direct sun exposure.

On-grid or off-grid?

Mine will be an on-grid (or grid-tied) system, where I can pull energy from the utility as I need it (at night, for instance) and send excess energy back to the grid when my panels produce more than I’m using. In my case NV Energy will pay me 75% of their usual rate for any excess I send them. For instance my solar panels will likely produce more energy than I need in sunny Las Vegas summers, but less than needed in the cloudy, short days of winter. Being tied to the grid allows me to balance those out to some extent. I will still have to pay a monthly base (about $13.25) to the utility , plus the cost of whatever net energy I use from the grid (at night or peaks), plus taxes.

One disadvantage of grid-tied systems, which surprises many people, is that if the grid goes down in a blackout, your solar panels are completely disconnected and will not supply power to your house. You’re blacked out too! This is mostly for safety, to make sure your panels don’t send power through the lines as workers repair them. To avoid this you would need to install additional equipment to provide an off-grid option.

NV Energy offers me a 20-year contract that supposedly guarantees my access to the grid on the current (pun!) terms. That’s important, because as more private solar installations come online those terms are likely to adjust without a contract. I need to take a closer look at that contract … I had no choice but to sign it.

Every Kilowatt hour (kWh) of energy counts: those you generate with solar, those you feed to the grid and what you use from the grid. An old-fashioned 100-watt light bulb consumes 1/10 of a Kilowatt in an hour, for which Nevada Energy would charge me about 1.2 cents on their standard rate plan. (Learn about TOU rates here.)

If you go off-grid you will need batteries and/or generators to provide power when the solar can’t keep up, like at night, cloudy days, or peak temperatures. The amount you save might well pay for the batteries but I haven’t built that into my spreadsheet yet, and I don’t plan to go that route at first. A big advantage of off-grid systems is that they continue to operate when the grid goes down (blackouts). You may also avoid paying the utility a monthly access fee.

A hybrid system allows you to switch back and forth between grid and solar/batteries/generator etc. In terms of initial outlay, a grid-tied system will probably be cheapest, followed by hybrid with a standby generator, with off-grid being most expensive unless you DIY. People who need power with 100% reliability should consider that they might need a generator.

My general advice is to install a grid-tied system if you can, because you can always add the necessary batteries and equipment to go off-grid later. The incremental cost will be about the same, or less as batteries get cheaper.

Here’s a more detailed (though somewhat outdated) opinion.

Rent or Own?

As I understand it, you should not choose to rent your system, though the monthly cost may be much lower than owning. Your lease may run for many years, with a lien on your house. If you decide to sell, it may be difficult to find a buyer willing to pick up the lease. You may have to pay the lease off yourself. You might even have to pay (a lot) extra to have the system removed if the new owner doesn’t want it up there.

Now or later?

Many people think the cost of solar panels and batteries will decrease significantly in the next few years, so it might be wise to wait. Factoring in the US rebate, low interest rates, climate change, rising utility costs and current terms of contracts with the grid (which will no doubt become less favorable as cost of solar decreases), it’s risky to delay.

Conservation is the cheapest way to save

You should do everything you can to manage your electrical usage before you start looking at Solar. See Part Two for details. Then you can compare solar to your reduced usage to calculate needed capacity and payback.

The numbers

The financial benefits of rooftop solar panels are not overwhelming

Using a few numbers you can calculate how much you might save by using solar.

  • Your overall consumption of electricity in a year, let’s say 12,000kWh. (Actual numbers will vary depending on your own situation.)
  • The amount your system generates, let’s say 13,200kWh, and it cost $14,400 after rebates.
  • The portion of what you generate that you don’t use and can sell to the utility, let’s say 4,800kWh
  • Using these numbers, you would have to get 3600kWh from the grid, but you would get credit (at perhaps 75%) for the 4,800kWh you send back, so it’s a wash.
  • You’re saving the cost of the 12,000kWh you’re generating. At $0.10 per, that’s $1,200 a year.

You might say you have a 12-year payback (14400/1200). But there are factors that tend to make payback quicker: rising utility rates, increased consumption due to climate change and improved public perception of solar power resulting in higher prices paid for solar homes. There are also factors that may reduce payback: loan costs and maintenance. Reducing electricity use saves money overall but reduces payback.

When I first started looking at the numbers, solar seemed to be almost a no-brainer. The US government is providing a 26% tax rebate. On a $23,000 system (like mine) that’s $6.000 dollars up front.

If you’re self-employed, keep in mind the credit CANNOT be used to pay self-employment taxes, only income tax.

Most people take a loan to pay for the system, and the rebate might cover the first few years’ payments. I will be cash-flow positive for about six years, even while paying the monthly loan, the utility base fee, some kWh from the utility, and the increase in my homeowner insurance premium and property taxes.

After six years, though, I will have “used up” the rebate and my cash flow may take a steep downturn. Expenses probably exceed the benefits for the last 5 years of the 12-year loan. I may go under by about $5000 at the end of the loan, but after that monthly savings kick in. By year 15 I’m cash-flow positive again with at least 10 more years of life in those panels. I’ll probably be dead by then but for a younger person who is settling down those would be the energy gravy years. If I do happen to live past age 80, I’ll especially enjoy the “free” energy. One of the benefits of going solar is that you tend to pay energy costs up-front, and save when you may most need to save.

The fact is, most people don’t live in the same house for much more than 5 years. One way to look at the “investment” is that the rebate will pay your bills for the first five years. When you sell your house you’ll pay off the loan (hopefully with some of the proceeds), so what matters most is finding a buyer willing to pay a reasonable amount extra for the solar. It’s possible that, rather than being a drain on cash flow, your solar installation has been an investment in a high-return asset that basically paid (mostly) for itself all along.

I live in Las Vegas, one of the sunniest places in US. Your results will probably be less cost-effective than what I describe in this blog.

To estimate daily sunshine in your location, use pvwatts.

Don’t worry about the utility base fee

If you’re on the grid you will pay the same basic “entrance” fee as any other users, anywhere from about $10-$25 a month. Not much you can do about that, except to go off-grid. When calculating cost-effectiveness of solar, compare only the actual cost of electricity above the base. There’s no point to comparing your total bills now to your total bills with solar; all that matters is how much you save on the kWh you use.

Watch out for the “little things”

When you’re looking at 25 years, every little expense tends to add up. The economics of solar seem to have been figured out to the penny, by the utilities, government, manufacturers and the contractors. Seemingly insignificant things like the monthly utility base fee, the 5% utility tax, or getting only 75% of retail for the kWh you send back to the grid, tend to tip the balance out of your favor. No matter how many pencils you wear out figuring, you’ll still have only a rough estimate of what will happen in the real sunlight. It’s not a slam-dunk, financially.

Monitoring

You will need to monitor your system for as long as you care about whether it’s working or not. That means your system needs to communicate somehow. My system includes a GSM transmitter (like a cell phone) that costs $5 a month for the service. The first five years ($300) were included in my contract. I didn’t notice this item, or I would have asked about using my home wifi to connect the system to the Internet for free.

Building equity?

In the meantime, the saving grace is that I may be building up equity that will be returned when I sell the home. That may be better than funneling all that cash to the utility. At the end of the loan, when I’m $2,500 in the hole in cash-flow, I hope those panels will still be worth at least $10,000. It is a risky investment, but perhaps a sensible one.

One way to look at your solar investment is that it’s an asset that pays much or most of its cost itself.

Choose your loan wisely

Like car salesmen, solar providers sell their systems by quoting a low monthly amount that involves a long-term loan. That can be a reasonable approach if you’re planning to keep the car (or solar panels) for the life of the loan and beyond. It makes a lot less sense if you think you’ll trade your car in after three years, or sell your home in five or seven years.

I was offered loans as long as 20 years, which would reduce the monthly payment and make the cash-flow look a bit better. Keep in mind that you will probably have to pay that loan off early when you sell your home. A longer-term loan is going to have a bigger balance to pay for two reasons:

  • Principal is paid off over a longer term
  • You may have paid a significant “fee” to obtain the loan. Although that fee is spread out over the term of the loan, you’ll basically have that extra chunk to pay if you pay off early.

I chose a shorter 12-year term, with a smaller fee, to reduce the risk that I would face an unmanageable amount to pay if I have to pay the loan off early. Otherwise it could eat up a lot of the “profit” I’d make when selling.

Your agent may not like it

Real estate agents frown on solar because they believe it narrows your market when you sell. They’ve also run into significant issues when a solar installation is rented instead of owned, of if the bank puts a lien on your house instead of just the panels. (That should never happen. There may be a UCC-1 lien, however, which is different.) You may have to wait patiently for a buyer who appreciates the value of solar and is willing to pay a reasonable amount extra for it.

Some studies indicate solar panels add an average of 2%-4% to the value of a home. On a $300,000 house that might be $12,000 for a system that cost you over $20,000. Here’s a more optimistic view from Green Mountain Energy.

I used a depreciation model in my spreadsheet. I start the value of the system at 70% of cost and depreciate by 0.39% per year.

A hedge?

The value of the system may be more as a hedge against future climate change (in the warming direction) and increased energy costs from the utility. I’m not figuring in climate change, but estimates are that utility costs will increase 3% per year. To some extent this advantage is mitigated by the fact that panels are rated for their performance at 77 degrees F, but efficiency is reduced as temperatures rise.

Your carbon footprint

It sure seems like solar panels on your roof will go a long way toward reduction of your personal contribution to global climate change. Even if you were to wind up losing a bit of money over the long run on solar, this benefit seems significant.

This article indicates that the carbon costs of producing and transporting my solar panels might be paid back within the first year. The cost of recycling/disposing of the panels at the end of their life cycle remains unknown.

I’ll post here again as I go through the process, and I’ll provide helpful details about the calculations involved.

Part Two: A Secret Way to Save

Resources:

PVWATTS calculator

Rough Draft of my spreadsheet. Click “Assumptions” tab after opening.